Showing posts with label DIY Flowers. Show all posts

5 October 2016

Creative with Flowers - # 21 - Pink Dahlias and Eucalyptus


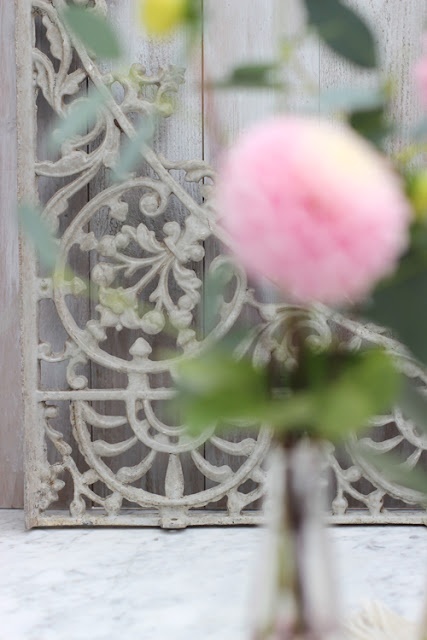
I'm still enjoying the last few flowers with summer colours - like these pale pink Dahlias with a white and soft yellow centre. Aren't they gorgeous? 


This series of blog posts - called 'Creative with Flowers' - are about using flowers in creative ways. It could be about how the flowers are combined - maybe in a little bit of an unusual way. It might be the choice of vase - maybe not a vase at all but a container that could be anything from jugs, bottles, jars, tins or teapots - vintage or new it doesn't matter. 

As always my arrangements will be quick and easy - and there will always be lots and lots of colour!


I love bringing flowers home from the farmer's markets and my local dependable flower stall - sometimes I will also venture to one of the nearby supermarkets.


My routine is always to condition the flowers as soon as I get home - even before I do anything else!


So make sure to condition the flowers as soon as you get home. Remove any foliage that will end up below the waterline in the vase. Trim the ends of the stems at an angle and put in fresh water as soon as possible.


I have used three little bottles from IKEA as my vases for the Dahlias and Eucalyptus. I found the set at a local charity store.

They have quite a narrow neck so perfect for just a few stems.


I have used one Dahlia stem and one or two stems of the Eucalyptus. That was really all that would fit into the narrow neck - but I have then repeated the same arrangement in all three vases. Keeping the three containers together as a little group works well and has more impact than just a single vase on it's own.


As my little side arrangement for a few short Eucalyptus - I used a very small preserving jar.

I have also used a few props: a small place mat from Sweden in a rag rug technique; a mini watering can with a ribbon from Jane Means' Ribbon Collection; and some Victorian iron works from a local reclamation centre. 


Enjoy your flower arranging and have a fabulous and floral Wednesday!

Thank you for visiting 'Of Spring and Summer - I will be back on Friday with another FLOWERS by ingrid and titti. Hope to see you then. 
Ingrid 

~ xoxo ~

[Styling, photography and text © Ingrid Henningsson/Of Spring and Summer.]
[Gorgeous Flowers and foliage from: Forever Green Flower Company.]
[Ribbon from: Jane Means' Ribbon Collection.]

P. S. Did you know that you can subscribe to receive a notification via email whenever I have a new blog post. Just fill in your email address at the top of my blog on the right and an email will come right into your inbox.

For more floral inspiration you can follow me on:

Facebook: https://www.facebook.com/ingrid.henningsson

18 April 2016

Tiny Blooms - # 28 - Pink and White Tulips


This series of blog posts - called 'Tiny Blooms' - are about small flower arrangements. Small - might be the size of the container or it could be the size of the flowers or the amount of stems. It can also be that the arrangement is minimal both in presentation and that it's simple, quick and easy to do. Apart from that there are no other strict rules - I'm allowing myself a lot of creative freedom!

I LOVE vintage blue and white floral china and I have to admit that I have quite a few pieces in my collection. At one point many years ago I had to stop collecting - but I'm so happy that I have it - and I use it all the time for flower arranging, styling and as props in my photographs.

In these two photographs I have combined a floral blue and white jug with bright pink and white tulips. I cut the stems quite short and took off most of the leaves and really put in as many as I could fit into the little jug. 

The old jug works perfectly as a vase and the flowers sit very happily in it. The colour contrast between flowers and jug is both pretty and dramatic.  


Enjoy your flower arranging and have a fabulous and floral Monday!

I'll be be back soon with more floral delight from Of Spring and Summer.

Ingrid 

~ xoxo ~

For more floral inspiration follow me on:

Facebook: https://www.facebook.com/ingrid.henningsson

2 December 2015

DIY Flower Tips and Inspiration - #15 - White Amaryllis


This week my 'DIY Flower Tips and Inspiration' - is about how to make the flowers on your Amaryllis last a bit longer.


The Amaryllis usually have several flowers on each stem - that opens up one after the other - not all at the same time. As the flowers continue to open - you need to remove the old spent flowers. You can use a knife or a pair of scissors. Do it carefully - the little short individual flower stems sit very close together!


Then comes the moment when there is only one or two flowers left on each stem and the whole arrangement starts to look a bit sparse! 

What you can do is to simply cut the remaining flowers off the stem and put them in either their own individual vase, jar or container or put a few in each. 

They will last for a few more days and looks lovely grouped together on a tray or in a row on a table. The flowers are so big, that even as single flowers in their own little container on a small side-table, they will have enough impact to make an impression. 


Enjoy your flower arranging!

I will be back on Friday with another 'A Bunch for the Weekend'.
~ xoxo ~

Ingrid


[Styling and Photography: © Ingrid Henningsson/Of Spring and Summer.]


25 November 2015

DIY Flower Tips and Inspiration - # 14 - Orange Tulips and Ranunculus


This week 'DIY Flower Tips and Inspiration' - is mostly just orange. Tulips are appearing more and more on the flower stalls and Ranunculus have just popped up their pretty heads.


I found some gorgeous orange Tulips - the petals have streaks of darker colours that gives a variegated marbled effect - and makes them look just super pretty!


Some of the bright orange Ranunculus are in tight buds others have opened up showing their layers and layers of thin petals.

The vase is a vintage jar from Sweden and the sugar bowl is from the 1930's Art Deco period and from my grandmother back in Sweden. The chevron black and white fabric becomes an interesting contrast in colour and form.

The two flowers contrast each other in texture but match almost perfectly in colour. For somebody like me who loves colour - this combination just makes me swoon!! 


Enjoy your flower arranging!

Titti and I will be back on Friday with another FLOWERS with a new and different theme.
~ xoxo ~

Ingrid


[Styling and Photography: © Ingrid Henningsson/Of Spring and Summer.]


14 October 2015

Do-It-Yourself Flower Tips and Inspiration - # 10 - Dahlias


This time 'Do-It-Yourself Flower Tips and Inspiration' is all about Dahlias.


Here is a little bit of facts and information about the flower: 

- Dahlias are named in honour of the Swedish Dr. Anders Dahl (1751-1789), who was a botanist and pupil of Carl Linnaeus.
- Dahlias are originally from Central America; Colombia and Mexico
- The Aztecs cultivated Dahlias for food and for decorative purposes.
- It's the national flower of Mexico.


I have created a very bright arrangement of two different Dahlias - in a large stainless steel flower bucket - then added a handful of similar coloured items - even the books are matching!


- Dahlia is an old garden flower that was out of fashion, as a cut flower, for a long time but recently have become very popular again.
- Dahlias are available from mid summer well into autumn.
- Dahlias come in an endless array of sizes, shapes and astonishingly vivid colours.
- When buying Dahlias look for crisp foliage and make sure the outer petals are firm not shrivelled. The centre of the flower should be very tight.
- Like always remove all foliage below the water line in the vase.
- Cut the stems at an angle.
- Stand in a cool position away from direct sunlight and radiators.
- Change the water frequently and re-cut the stems and the flowers will last longer.
- In general it's not a long lasting flower - 5-7 days is all you will get out of this flower - so look after it well. 
- At this time of year they mix well with berries and autumn leaves.
-Enjoy this gorgeous flower while you can!


Enjoy your flower arranging!


I will be back on Friday with another 'Bunch for the Weekend' from 'Of Spring and Summer'.

~ xoxo ~

Ingrid


[Styling and Photography: © Ingrid Henningsson/Of Spring and Summer.]


23 June 2015

Do-It-Yourself Flower Tips and Inspiration - # 8 - Sweet William Flowers


Pink Sweet William


This time 'Do-It-Yourself  Flower Tips and Inspiration' is all about Sweet William flowers.

Pink Sweet William

  • Sweet William is the common name - the botanical name of the flowers in Latin/Greek is Dianthus barbatus.
  • It's in the Caryophyllacae family commonly called the pink or carnation family .
  • The first part of the name comes from the Greek di or dios meaning god or divine - referring to the Greek gods. The second part of the name anthos means flower.

  • Barbatus means bearded or hairy as a small part of the flower has tiny hairs.
  • Sweet William is an old-fashioned cottage garden favourite and have been grown in Britain for hundreds of years.
  • The flowers has a lovely clove-like scent.

  • The Duchess of Cambridge had white Sweet William in her wedding bouquet when she got married to Prince William in 2011. Kate chose the flower as a tribute to her bridegroom.
  • They come in many colours - white, pink, red, purple as well as many variegated colours.
  • The flowers attracts bees and butterflies. 
  • The flowers are edible and have a peppery, clove like flavour and can be used in salads. 
  • Cut stems between the nodes for maximum water uptake.
  • They are long-lasting - about 5-10 days - and are great value for money. 


The flowers are British and grown by the brilliant Cel Robertson at Forever Green Flower Company.

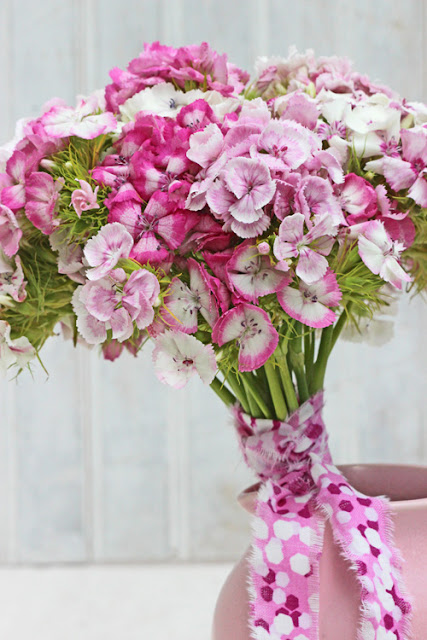
I made a little bouquet entirely made up of different light pink Sweet Williams. I made a fabric ribbon from a piece of fabric in similar pink tones and tied that around the stems and I used a vintage pink jug as my vase. 

My bright pink creation for the month of June - even though it's cold and rainy here in London.

Pink Sweet William


Enjoy your flower arranging!


Have a Great Floral Day!

I will see you later in the week with more Do-It-Yourself flowers from 'Of Spring and Summer'.

~ xoxo ~

Ingrid

[Styling and Photography © Ingrid Henningsson - Of Spring and Summer]
[Flowers from Forever Green Flower Company.]

You can also find me on:

Instagram - https://instagram.com/ofspringandsummer/

Pinterest https://www.pinterest.com/ofspringsummer/

Facebook - https://www.facebook.com/ingrid.henningsson

27 May 2015

DIY Flower Tips and Inspiration - # 5 - Freesia


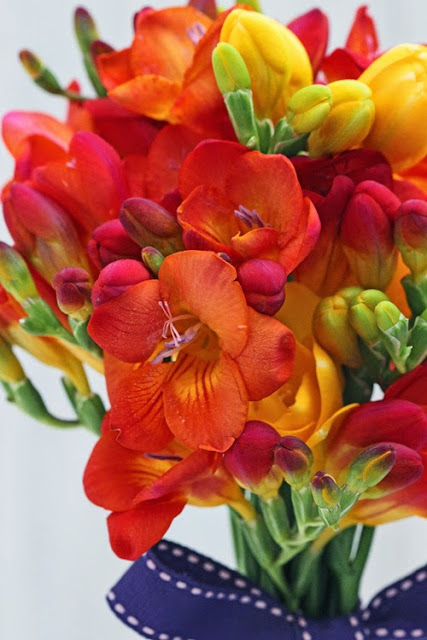
Colourful Freesia


This time 'Do-It-Yourself  Flower Tips and Inspiration' is all about the lovely flower Freesia.

  • When you buy Freesia look for plump buds and make sure at least one flower is open or about to open.
  • The flowers open from the bottom of the stems towards the top.
  • Not all the buds will open up along the raceme - to stimulate buds further down to open - you can remove some of the smallest buds at the very top of the flower stem. You can easily snip them off with a pair of scissors.
  • Also remove any wilted flowers to encourage further flowering.
  • Freesia are sensitive to ethylene gas so don't put them near any ripening fruit.
  • Freesia comes in many different colours - pure white, lemon, yellow, orange, gold, amber, pale pink, deep pink, lilac, pale purple and purple.
  • They last for about 5-7 days.
  • Buy some and enjoy their wonderful scent! 


Colourful Freesia


Have a Great Floral Day!

I'll see you later in the week with more Do-It-Yourself flowers from 'Of Spring and Summer'.

~ xoxo ~

Ingrid


[Styling and Photography © Ingrid Henningsson for Of Spring and Summer]
[Ribbons by Jane Means.]


You can also find me on:

Pinterest https://www.pinterest.com/ofspringsummer/

Facebook - https://www.facebook.com/ingrid.henningsson


18 May 2015

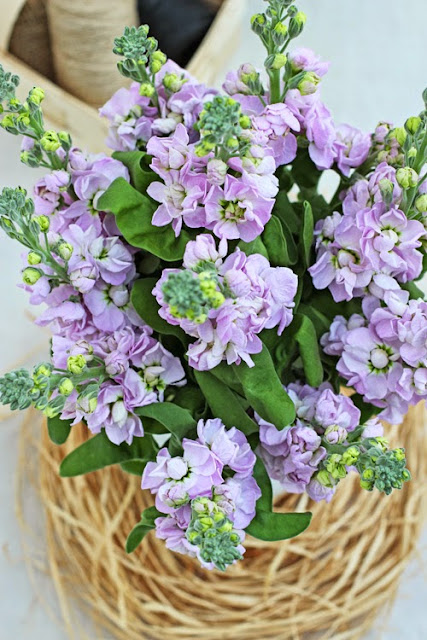
DIY Flower Tips and Inspiration - # 4 - Stock Flowers


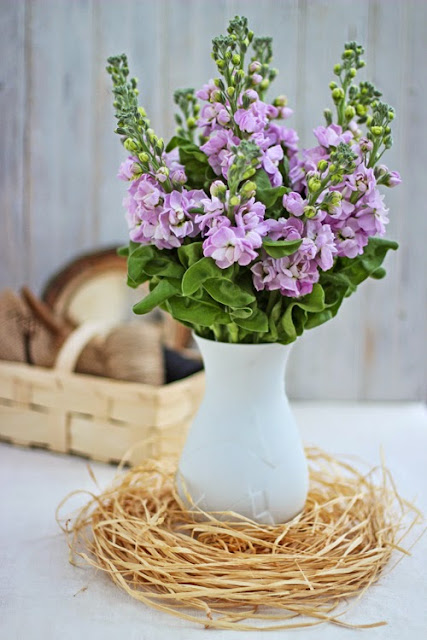
Pink Stock lowers in a white vase with raffia


Here is another instalment in my new series: 'DIY Flower Tips and Inspiration' - and it's all about Matthiola. The common name for them is Stock or Gillyflower.

  • Try to buy the flowers when the top flowers are in bud and the lowest flowers are open.
  • Remove most of the leaves - the leaves are lush and fleshy and will take the water needed for the flowers.
  • Cut away any white parts at the bottom of the stems - or the flower will not be able to take up water.
  • Stock flowers do best in shallow water - so just fill the vase with a little bit of water. Just remember to change water when you need to.
  • The individual little flowers are easily broken off - so handle with care! 
  • They last in a vase for about 5-7 days.
  • Stock is a wonderful sweetly fragrant flower that comes in beautiful colours.
  • Buy some and enjoy!

Pink Stock flowers with raffia


Have a Great Floral Day!

I'll see you later in the week with more DIY flowers from 
'Of Spring and Summer'.

~ xoxo ~

Ingrid


[Styling and Photography © Ingrid Henningsson for Of Spring and Summer]


You can also find me on:

Pinterest https://www.pinterest.com/ofspringsummer/

Facebook - https://www.facebook.com/ingrid.henningsson


6 May 2015

DIY Flower Tips and Inspiration - # 3 - Pink Peony


Pink Peony

Here is another instalment in my new series called: 'DIY Flower Tips and Inspiration' - and it's all about that very special beauty the Peony.
  • Select peonies that are showing some colour in the bud - if the bud is too tight when cut they might not open up.
  • To encourage peonies to open - here is something you could try. Hold the flower upside down and spray with water to remove the sticky sap around the bud.
  • Peonies are thirsty flowers - so remember to top up with fresh water in the vase.
  • Put the vase with peonies in a cool spot to prolong the life of the flowers - especially at night.
  • Peonies last for about five days in bud and up to five days in flower.

Pink Peony

Have a Wonderful Floral Day!

I'll see you later in the week with more flowers on 
'Of Spring and Summer'

~ xoxo ~

Ingrid

[Styling and photography © Ingrid Henningsson for Of Spring and Summer.]


*****

15 April 2015

DIY Flower Tips and Inspiration - # 1 - Tulips


Tulips continue to grow in the vase. You have a few choices:

  • Cut the stems a little bit shorter allowing for some growth in the vase.
  • Trim the stems every two days - when you change the water in the vase - to keep them the same length. 
  • Leave the tulips to grow, bend over and do their own thing - only trim the stems the absolute minimum.

Tulips are always beautiful - long or short!


Have a Wonderful Floral Day!

~ xoxo ~

Ingrid

[Styling and photography © Ingrid Henningsson for Of Spring and Summer.]
[Yellow tulips from Forever Green Flower Company.]


Related Posts Plugin for WordPress, Blogger...