Showing posts with label Amy Trachtenberg. Show all posts

16 September 2016

A Bunch for the Weekend - # 85 - Hydrangea and Eucalyptus


I know that I have featured a lot of Hydrangeas lately - but what's a girl to do? A major weakness for hydrangeas? Well, that might be an understatement.... so here we go again....!


It's always a pleasure and lots of fun to buy a bunch of flowers for the weekend and this series of blog posts, called 'A Bunch for the Weekend, will show you how you can make quick and easy flower arrangements for your home. 

Buy the flowers where it's convenient and easy for you whether that is from a flower stall, farmers' market, the supermarket or a florist. 


Always try to buy seasonal flowers - they will be a lot cheaper.


Make sure you condition the flowers as soon as you get home. Remove any foliage that will end up below the waterline in the vase. Trim the ends of the stems at an angle and put in fresh water as soon as possible.


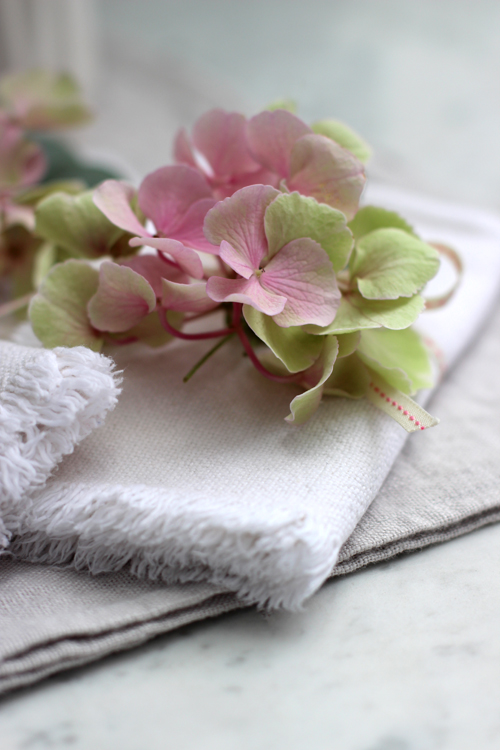
These beautifully coloured hydrangeas has a delicate mix of light pink and equally light green petals.


As a little bit of a contrast colour I added some muted grey green Eucalyptus foliage.

In the background is a small 'side vase' with a very, very delicate grass called Panicum. 


I have also made some napkin rings by simply tying a thin ribbon around a folded napkin and then stuck some sprigs of eucalyptus and hydrangea under the ribbon.

The ribbons are from Jane Means' ribbon collection. It's a narrow stitched grosgrain with pink stitching along the middle.

On the little foot stool are two Marimekko Iittala Kivi tea light holders. These two are in clear glass but they come in many different beautiful colours.

The other tealight holder is from Georg Jensen it's called Bloom and is made of stainless steel. I love the simplicity of the shape and the silver colour.

The painting in the background is by my dear and very talented sister-in-law Amy Trachtenberg.


Hydrangeas are only with us for a little bit longer - enjoy them while you can....!


Enjoy your flower arranging and have a fabulous and floral Friday and a great weekend!

Thank you for visiting 'Of Spring and Summer' - I will be back On Sunday with another floral quote by someone passionate about flowers. 

Ingrid 

~ xoxo ~

[Styling, photography and text © Ingrid Henningsson/Of Spring and Summer.]

[Ribbons from Jane Means' ribbon collection. I am part of Jane Means' Ribbon Bloggers Team - who on a regular bases feature Jane's ribbons.]

P. S. Did you know that you can subscribe to receive a notification via email whenever I have a new blog post. Just fill in your email address at the top of my blog on the right.

For more floral inspiration you can follow me on:


16 October 2015

A Bunch for the Weekend - # 61 - Autumn Colours


Hydrangea Autumn Colours

This weeks 'A Bunch for the Weekend' - is all in muted autumn colours. Pale purple and olive green Hydrangea with some rust coloured shades. Also mixed in are some pale grey green Eucalyptus leaves and some bright white snowberries.


Hydrangea Autumn Colours

HOW TO:

You'll need:

- 10 stems of Hydrangea in muted colours.
- 5 stems of Eucalyptus leaves.
- 5 stems of snowberries.
- 1 medium sized zinc florist bucket - for the arrangement
- 3 zinc florist buckets in various sizes - just to use as background props.
- 1 very small zinc container - to use as a side arrangement with Eucalyptus or snowberries.

For conditioning the flowers - you'll also need:

- a pair of florists scissors
- a florist bucket filled with fresh water

Condition the flowers by removing any leaves that would end up below the water line in the vase. This is to reduce any growth of bacteria from deteriorating leaves. Also remove any broken or bruised leaves.

Cut the stems at an angle - this is to increase water absorption.  

Put in a clean container with fresh water and leave in a cool, dark place over night or at least for a few hours, to let the flowers absorb the maximum of water, before making the final arrangement.


You might have to re-cut the stems while making the final arrangement to suit the size of the vase or container and to get the right proportions.

Hydrangea Autumn Colours

Method:

Hydrangea has very few but large leaves - leave them on if you like the look of them or take off some or all of the leaves. 

I have left a lot of the leaves as I feel they added interesting texture and colour.

Fill the containers with fresh, clean water. Trim the stems so that some of the flower-heads rests on the edge of the vase. Cut some of the stems shorter and position those around the edges of the container. Fill in with a few longer stems throughout for a bit of variety and movement.

Finish off by adding the Eucalyptus and the snowberris throughout the arrangement.

Change the water every 2-3 days and if possible re-cut the stems. The flowers can last for about 7-14 days. 


Hydrangea Autumn Colours

The four pieces of artwork are by my dear sister-in-law Amy Trachtenberg who lives and works in San Francisco. I have always enjoyed having her beautiful and very tactile artwork around the house and often try to incorporate them in my photography. 

Hydrangea Autumn Colours

Enjoy your flower arranging and have a great floral day!

I will be back on Sunday with another Florets - floral quotes by people passionate about flowers!

~ xoxo ~

Ingrid


[Styling and Photography: © Ingrid Henningsson/Of Spring and Summer.]
[Artwork by Amy Trachtenberg.]


You can also find me on:


4 June 2014

FLOWERS by ingrid and titti - Romantic Roses


This week on FLOWERS Titti and I have chosen the theme Romantic Roses. This time of year it will be plenty of roses in flower. Or so we thought but the weather in Sweden has been a bit cold and Titti told me that roses were in short supply in her garden and here in London we have had quite a lot of rain. Cold and rain is not the best conditions for roses. So when I went out in my garden to see what was available - I was met by very sad, soggy and brown edged flowers that was not at all ready for the camera.......! 


In the end I did find a few - like this little beauty called Rosa 'Ferdinand Pichard'. It's a little bit of an unusual rose - no two flowers are ever alike. It's pale pink with crimson stripes and splashes all over the petals and has a wonderful strong and sweet scent.


What I also did find was plenty of peonies and I decided to mix in a few with the roses. I think they are at least as romantic as roses and they didn't seem to have minded the British weather. This one is called Peony 'Sarah Bernhardt' - named after the French stage and screen actress.

As a contrast to all the romantic flowers I have used clear glass laboratory containers, beakers, jars and measuring jugs. All vintage and the clear glass nicely shows off the stems.


I found two other roses on my local rounds  - this one called 'Blue Pacific' - it has a light lilac colour but no scent. It's used a lot in bridal bouquets - so it fitted right in with our romantic theme.


The last rose is a little white spray rose - it has tinges of green on the edges of some the petals and I think its lovely.

The painting in the background in a lot of the images is by my dear sister-in-law Amy Trachtenberg.


In contrast with the romantic theme I added a few black props - a book with a black cover, three vintage knives with black handles, a black Jane Means ribbon tied around the knives, a small metal tin, some black dice, black and white bakers' twine and a small Marimekko bowl. 
  

This last image is of one of my favourite flowers at the moment - but my favourite changes with every season - this is just common cow parsley. 

Titti over on HWIT BLOGG will also be posting about Romantic Roses so please go over and have a look at what she has done.

Here is a link to all the previous FLOWERS Titti and I have done over the last six months. 

You can also see all the images on my Pinterest.

Have a Wonderful Floral Day!

See you later in the week.

xoxo Ingrid

7 May 2014

FLOWERS by ingrid and titti - Flowering Branches


It's May and time for the first of FLOWERS by ingrid and titti - and the theme is Flowering Branches. 
Here in London I was able to find quite a lot of beautiful flowering branches and it was hard to resist some of them  - so I ended up picking three. 

The first is lilacs in a beautiful dark pink colour and they also have the most stunning scent. Condition the branches by removing some or even all the leaves. Some florists say you should remove all the leaves to make the flowers last longer. If you like to have some lilac leaves- cut off a few separate branches and stick those in with the other flowering 
branches with no leaves.

When you condition branches - as well as cutting the stems at an angle you also need to make a vertical cut upwards on the stem. This is to increase the surface that can absorb
water. The advise you get today is NOT to smash the stem with a hammer - that will increases the growth of bacteria. 


I put the lilac branches in a white glass vase designed by the Finnish architect Alvar Alto. In the back is a painting by my sister-in-law Amy Trachtenberg and I also added a black Pueblo pottery bowl from New Mexico. 


The second flowering branch is called Sorbus aria or whitebeam and has silvery grey leaves. It's often used as a foliage plant by florists and at this time of year it also has small clusters of silver grey buds.

I put the branches in a vase from Habitat that I found in one of my local charity stores. Mixed in on the table are some black objects - garden twine and a small round box that I inherited from my father -  as well as some new and vintage metal objects - old keys from Sweden, a vintage Singer sewing machine oil can, a new little wire basket and a mini watering can.


I find the simplicity of just a few branches delightful and I specially like the clusters of buds and the downy underside of the soft green-grey spring leaves.
   

The last of the branches are some Viburnum opulus or guelder rose as they are also called. Viburnum opulus is a garden shrub - it has a woody stem and pompom-like heads made up of clusters of tiny very light green florets. 

This one is a little tricky - the heads tends to hang and look a bit droopy - so either go with the flow and embrace whatever the flowers wants to do. Or you will have to support the heavy flower heads either by packing them tightly together, using other sturdy stems to make a grid as support in a mixed arrangement or by cutting the stems quite short and let them rest on the sides of the vase or container. 


I call this last arrangement -  'My Grandmother arrangement' - as I have used my grandmother's old coffee tin and a handwoven rag rug that once belonged to her.

I have only used the tin as an outer container - inside is a jam jar filled with water holding the branches. Old metal tins and containers tend to rust quite easily if you leave water in them for any extended amount of time - and I don't want this tin to rust. I have cut the stems quite short and the flower heads are resting on each other as well as on the sides of the tin.


My collaborator Titti Malmberg over on HWIT BLOGG is also posting about flowering branches - so go over and have a look at what she has done.

Here is also a link to all the previous FLOWERS by Titti and I. 

Have a Wonderful Floral Day!

See you soon!

xoxo Ingrid

Related Posts Plugin for WordPress, Blogger...
