Showing posts with label Vintage Bottles. Show all posts

14 December 2016

Creative with Flowers - # 28 - White Amaryllis


This week on 'Creative with Flowers' - I'm featuring some gorgeous white Amaryllis. It's such a perfect flower for this time of year. Easy to look after - you just need to know a few little tricks and all will be well!


This series of blog posts - called 'Creative with Flowers' - are about using flowers in new and creative ways. It could be about how the flowers are combined - maybe in a little bit of an unusual way. It might be the choice of vase - maybe not a vase at all but a container that could be anything from jugs, bottles, jars, tins or teapots - vintage or new it doesn't matter. 

As always my arrangements will be quick and easy - and there will always be lots and lots of colour!


Amaryllis must be the perfect flower - easy to condition, there are no leaves to remove, the flowers don't open up all at the same time, they last for a long time and you just need a few stems as each stem has several flowers - so it makes a big impact.


This particular white Amaryllis has some green colouration inside the flowers fading to white. So I have added a few muted green vintage bottles and bowls. 


At this time of year I crave candles and I will always light some in the evenings.


There are a few things you need to keep in mind when you use Amaryllis as a cut flower. 

If you are making a tall arrangement put a thin bamboo stick up the stem to prevent the stems from breaking. The flower heads become very heavy and if there is no support the stems can break.

If you are making a short arrangement where the stems are supported by the side of the vase there is no need to do this.

Another advise you see is to fill the hollow stems with water. Simply turn the flower upside down, fill with water, plug the opening with some cotton wool , keep your thumb over the opening and quickly place in the vase. 

You also need to put a rubber band around the bottom of the stems to prevent the stems curling up. Floral tape also works well. Remember that the tape or the rubber band might be visible through a clear glass vase so you might want to use some other type of vase or container. 

I always cut the bottom of the stems straight across with a sharp knife on a cutting board - not at an angle. As the bottom of the flower stems tend to curl up - it will look much neater with a straight cut and easier to keep the rubber band or tape in place.  

Another thing I also do is that I remove the anthers filled with pollen as soon as a bud has opened up. This is to prevent the pollen falling on tablecloths and clothing. 

Trim off any faded flowers and enjoy the remaining flower heads.

In this arrangement I have only used three stems but each one has four flowers so altogether I have twelve  flower heads - I call that good value for money!


Enjoy your flower arranging and have a fabulous floral Wednesday!

Thanks you for visiting 'Of Spring and Summer'. I will be back later in the week with more floral delights. I'll see you then.

Ingrid 

~ xoxo ~

[Styling, photography and text © Ingrid Henningsson/Of Spring and Summer.]

P. S. Did you know that you can subscribe to receive a notification via email whenever I have a new blog post. Just fill in your email address at the top of my blog on the right and an email will come right into your inbox.

For more floral inspiration you can follow me on:

Facebook: https://www.facebook.com/ingrid.henningsson

26 October 2016

Creative with Flowers - # 22 - Pink Hydrangea and Eucalyptus


This week we are taking a look at some gorgeous deep pink Hydrangea and the foliage I'm using is the old dependable Eucalyptus.  


This series of blog posts - called 'Creative with Flowers' - are about using flowers in creative ways. It could be about how the flowers are combined - maybe in a little bit of an unusual way. It might be the choice of vase - maybe not a vase at all but a container that could be anything from jugs, bottles, jars, tins or teapots - vintage or new it doesn't matter. 

As always my arrangements will be quick and easy - and there will always be lots and lots of colour!


The Hydrangea is still going strong at the flower stalls. As we move into autumn the colours gets stronger, deeper and darker.


I kept a lot of the amazing dark green foliage on the Hydrangea. The foliage can often be damaged, torn or bruised so I rarely leave a lot on - but this time it just looked so good I left as much as I could on the stems.
  

While clearing out some old boxes from my loft I found this 30 year old Tampella fabric - a Finnish company very popular in the 1960's. Who would have known that it would still look this good today...!! And almost matching the pink flowers.


The grey-green Eucalyptus foliage contrast to the dark Hydrangea leaves and it also matches the light green bottles and jars that I have used as vases.


I'm so excited finding this old fabric - I love the colours and it has such a contemporary look and feel to. 

It's just a perfect fit for the way I love to mix old with new - vintage with contemporary.


Enjoy your flower arranging and have a fabulous and floral Wednesday!

Thank you for visiting 'Of Spring and Summer'. I will be back on Friday with another 'A Bunch for the Weekend'. Hope to see you then. 
Ingrid 

~ xoxo ~

[Styling, photography and text © Ingrid Henningsson/Of Spring and Summer.]

P. S. Did you know that you can subscribe to receive a notification via email whenever I have a new blog post. Just fill in your email address at the top of my blog on the right and an email will come right into your inbox.

For more floral inspiration you can follow me on:

Facebook: https://www.facebook.com/ingrid.henningsson

7 September 2016

Creative with Flowers - # 17 - Purple Lisianthus


Lisianthus is an extremely popular and very pretty flower - and it can last for up to two weeks. Pretty good!


This series of blog posts - called 'Creative with Flowers' - are about using flowers in creative ways. It could be about how the flowers are combined - maybe in a little bit of an unusual way. It might be the choice of vase - maybe not a vase at all but a container that could be anything from jugs, bottles, jars, tins or teapots - vintage or new it doesn't matter. 

As usual my arrangements will be quick and easy - and there will always be lots and lots of colour!


A close up of the delicate flower, some buds of different maturity and a few of the grey-green slender leaves - twisting and turning.


This time I have used three new contemporary vases. They are all fairly small and of three different material and colour. One clear glass, one black and one white. What links them are that they all have some kind of surface texture on the sides of the vases and they are all neutral in colour - not taking anything away from the flowers.

I have tied a piece of ribbon around the narrow neck of the glass vase. It's a dark purple stitched grosgrain ribbon from Jane Means' ribbon collection and it matches the purple flowers perfectly.

To make the most of this lovely flower: handle with care - the petal can easily mark and the stems can easily snap.


So from the same bunch I have made three slightly different arrangements. A low and tight arrangement with the stems cut very short, in the small black vase. A medium sized looser arrangement in the clear glass vase and a taller and compact one in the white vase.

I love how the buds sits above the flowers giving the arrangements lots of texture and movement.

During the summer mix with Scabious, Nigella or Freesia.

Great flower to use for arrangements to be placed on tables, in windows and on mantelpieces. 


Enjoy your flower arranging and have a fabulous and floral Wednesday!

Thank you for visiting 'Of Spring and Summer' - Titti Malmberg, from HWIT BLOGG, and I will be back on Friday with another FLOWERS. Hope to see you then. 

Ingrid 

~ xoxo ~

[Styling, photography and text © Ingrid Henningsson/Of Spring and Summer.]

[Ribbon from Jane Means' ribbon collection. I'm part of Jane Means' Ribbon Bloggers Team.]

P. S. Did you know that you can subscribe to receive a notification via email whenever I have a new blog post. Just fill in your email address at the top of my blog on the right.

For more floral inspiration you can follow me on:

Facebook: https://www.facebook.com/ingrid.henningsson


22 May 2016

Florets - Floral Quote - # 113 - by Lewis Miller


"I tend to like combinations that either follow each other on the color wheel, like red, red-orange, and orange, or that falls on opposite sides of the wheel, like orange and blue. Successful color pairings are ones that have an unexpected twist, like coral with pink and rust, which is an alluring mix of hues. The rust is crucial in that trinity; without it the resulting floral arrangement is too sweet, it's as though your teeth will fall out just from looking at it! Salmon and olive; ruby, cerise, and coral; dusty lavender,aubergine, and champagne: these surprising combinations keep your eyes engaged and delighted."
~ Lewis Miller ~

[Lewis Miller: American, New York-based floral designer, founder of Lewis Miller Design, making flower arrangements for private and corporate clients and author of Styling Nature.]
[Quote from: Styling Nature by Lewis Miller2016.]
[Flowers: Ranunculus.]
[Container: Vintage glass bottles.]
[Styling and Photography © Ingrid Henningsson/Of Spring and Summer.]

Enjoy your flower arranging and have a fabulous and floral Sunday!

I'll be back on Monday with more floral delights from Of Spring and Summer.

Ingrid 

~ xoxo ~


P. S. Did you know that you can subscribe to receive a notification via email whenever I have a new blog post. Just fill in your email address at the top of my blog on the right.


For more floral inspiration follow me on:
Facebook: https://www.facebook.com/ingrid.henningsson


20 April 2016

Creative with Flowers - # 6 - White Roses in Vintage Bottles


This week on 'Creative with Flowers' we are taking a look at some white roses very simply placed in a row of vintage bottles.


Roses, yes, roses - we all love roses - but growing your own roses can be a challenge. The UK has a damp climate that often produce mildew on the leaves. If it rains early in the summer even the flowers has mildew. Some years I struggle and other years my roses are a delightful and goes on flowering happily for months.   


To buy roses from the supermarket, flower stall or florist can also be challenging. Roses from the florist are expensive and the longer the stem the more expensive they are. From the flower stalls - the selection can be quite limited. Buying roses from the supermarket - the delicate petals are often bruised or creased. So a bit tricky all around!

These white roses are from the supermarket - and what I do is that I remove most of the leaves and any thorns, I trim the stems and give them a good drink. What I also do is that I remove any bruised outer petals by gently but firmly pulling them off from the bottom of the flower head. You are left with a little bit of a smaller head but once the rose has opened up all the way - you can't really see any difference. 


Here I have put five roses in five vintage bottles - all clear glass but different in size and look. I have varied the height of the flowers - but I have kept the height in proportion to the bottle. On two of the roses I have left a few leaves to give some visual variation and the rest have bare stems. 

Enjoying a few roses now and then is a great pleasure. Five roses are not going to break the bank and displayed like this in individual containers makes a great impact.


Enjoy your flower arranging and have a fabulous and floral Wednesday!

Titti and I will be be back on Friday with another very colourful FLOWERS - I for one can't wait to show you!

Ingrid 

~ xoxo ~

For more floral inspiration follow me on:

Facebook: https://www.facebook.com/ingrid.henningsson

9 October 2015

A Bunch for the Weekend - # 60 - Colourful Dahlias


This weeks 'A Bunch for the Weekend' is very colourful! Well why not, we all need a bit of colour at this time of year.


HOW TO:

You'll need:

- 7-9 stems of brightly coloured Dahlias.
- colour coordinate with a few vases and containers in contrasting or matching colours. In this case I have used some vintage green bottles, vases and containers in different sizes in contrasting colours. 
- I have also picked a painting as background showing bottles in similar colours and a vintage rag rug - also picking up the same colours.
- a handful of painted clothes pegs
- a gingham green and white ribbon

For conditioning the flowers - you'll also need:

- a pair of florists scissors
- a florist bucket filled with fresh water

Condition the flowers by removing any leaves that would end up below the water line in the vase. This is to reduce any growth of bacteria from deteriorating leaves. Also remove any broken or bruised leaves.

Cut the stems at an angle - this is to increase water absorption.  

Put in a clean container with fresh water and leave in a cool, dark place over night or at least for a few hours, to let the flowers absorb the maximum of water, before making the final arrangement.


You might have to re-cut the stems while making the final arrangement to suit the size of the vase or container and to get the right proportions.


 Method:

Dahlias usually has very few leaves - leave them on if you like the look of them or take off some or all of the leaves. 

I have taken off all leaves as well as any buds - I feel it makes you focus on the big beautiful flowers - but I also sometimes leave them on - it all depends on what kind of look I want. It's only on the flower in the tall bottle where I have kept the two side buds - where the stems makes some interesting angles.

Fill the containers one third with fresh, clean water. Trim the stems so that the lower leaves rests on the edge of the vase. The flowers in the bottles need to be in proportion with the bottle.

Change the water every 2-3 days and if possible re-cut the stems. The flowers lasts for about 5-7 days. 

For a very temporary but fun little arrangement I have filled a vintage flower pot with loose Dahlia petals.


Also for a different effect I have scattered some petals around on the Swedish rag rug.

The pretty little gingham ribbon in sage and white is from Jane Means collection of ribbons. I have tied it on a painted clothes peg - something you can do to fix place cards in place for a dinner party.  


Enjoy your flower arranging and have a great floral day!

I will be back on Sunday with another Florets - floral quotes by people passionate about flowers!

~ xoxo ~

Ingrid


[Styling and Photography: © Ingrid Henningsson/Of Spring and Summer.]


You can also find me on:


2 October 2015

FLOWERS by ingrid and titti - Vases, Bottles and Containers


Hydrangea and blue bottles on a blanket

The theme for this weeks FLOWERS is - 'Vases, Bottles and Containers'.

A few years ago I used to sell vintage on eBay - a big part of what I sold was exactly what our theme is about this week - vases, bottles and other containers. I had a lot of fun and my little business was very successful - but after a few years I ran out of steam - there are a lot of very early 5 am starts going on buying trips to antique-markets and car-boot sales in the UK and loppis in Sweden -  a fair amount of driving and it's also very competitive - everybody wants the best bits. 

My point of telling you this is to say that I still have a lot of vases, bottles and containers - that I just couldn't part with!

So here is are a few bits and pieces from my little collection....... 

Hydrangea

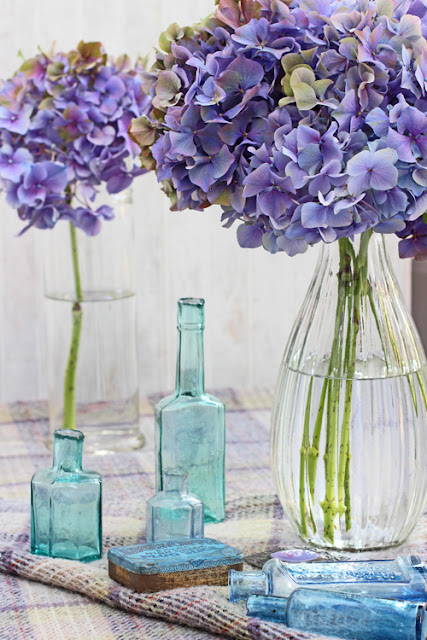
I love how the colours in this Hydrangea matches the colours in the blanket. Perfect autumn colours and don't you just want to wrap yourself up in the blanket and sit in front of the fire?

Blue bottles on a blanket

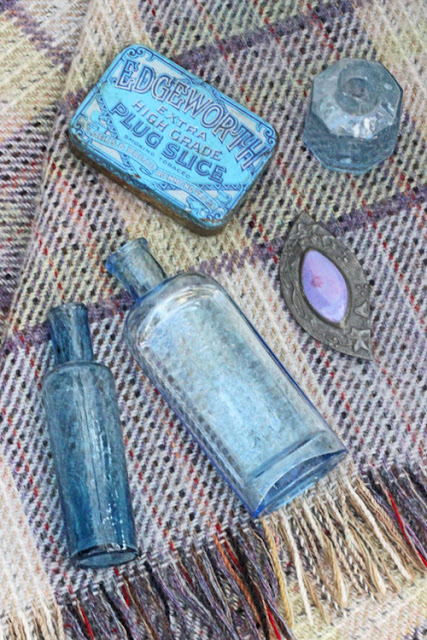
I have a bit of a weakness for blue bottles and my little collection often sits in a window where they reflect light into the room.

Hydrangea and blue bottles on a blanket

The large vase with ridges is new and I bought it in Sweden last summer. I was with my friend and she bought the same vase. We both love it as it holds the flowers very well - the neck is wide enough to hold a handful of large stems perfectly.

The large clear glass container with straight sides in the background is one of my favourites. My daughter bought it for me when she went to an antique market earlier this year.


Hydrangea and blue bottles on a blanket

The smaller vases are a mix of ink bottles and apothecary bottles in beautiful blue and turquoise-blue colours. All great for holding just one small stem - cut very short.

I have always enjoyed visiting antique markets or charity stores and I still find interesting types of containers that I will use as vases - for very little money.

If you intend to start your own little collection of vases and containers - flea-markets, car-boot sales, loppis and charity stores are a good beginning. 

Many small vases or bottles with single stems - arranged on a tray looks beautiful.

With larger containers you can either fill them with lots of stems or have just one stem leaning to one side.

There are so many different ways to use vases, bottles and containers. Why not go to your nearest charity store and pick up a few in different sizes and start experimenting making your own arrangements.   


Hydrangea and blue bottles on a blanket

Please, go over to Titti's blog and have a look at how she has interpreted the theme this week. Here is a link to her blog HWIT BLOGG.


Enjoy your flower arranging and have a great floral day!


I will be back on Sunday with another Florets - floral quotes by a flower lovers.

~ xoxo ~

Ingrid


[Styling and photography: © Ingrid Henningsson/Of Spring and Summer.]


You can also find me on:


25 April 2015

A Bunch for the Weekend - # 49 - Mixed Ranunculus


This week on 'A Bunch for the Weekend' - I'm featuring a mixed bunch of Ranunculus from the farmers' market.

You'll need:

- 18-20 stems of Ranunculus - in any colours 
-  an odd number of either vintage or re-cycled small bottles in a variety of sizes
- a tray or platter - you want a flat surface so the little bottles will stand steady 

For conditioning the flowers - you'll also need:

- a pair of florists scissors
- a florist bucket filled with fresh water

Condition the flowers by removing any leaves that would end up below the water line in the vase. This is to reduce any growth of bacteria from deteriorating leaves. Also remove any broken or bruised leaves.

Cut the stems at an angle - this is to increase water absorption.  

Put in a clean container with fresh water and leave in a cool, dark place over night or at least for a few hours, to let the flowers absorb the maximum of water, before making the final arrangement.


You might have to re-cut the stems while making the final arrangement to suit the size of the vase or container and to get the right proportions.


Fill the bottles with water and arrange them on a tray or platter. Make sure it's a flat surface the smaller bottles can become a bit top heavy when filled with flowers. 

Vary the amount of stems in the bottles - use open flowers, half open flowers as well as buds - both the once that are showing some colour and some green ones. It all forms an interesting variety of textures.

I have removed all the leaves as I like to see the long bendy stems - I have also kept the stems as long as possible without it looking out of proportion and without the bottles toppling over.

I think Ranunculus are one of the most charming and beautiful flowers at this time of year. Don't you agree?   


Have a Happy Floral Saturday and a Great Weekend!

~ xoxo ~

Ingrid


[Styling and Photography © Ingrid Henningsson for Of Spring and Summer]

28 April 2014

Flowers from the Flower Market - # 2 - Mixed Tulips


Here is another instalment of the monthly mini series of Flowers from the Flower Market.

It will be featuring a plant or flower that caught my eye at the flower market.

I will show two or three very simple ways of using, arranging or displaying the flower.

I spotted some mixed coloured bunches of tulips. I never buy already mixed bunches - as I like to pick and choose myself - but I really liked most of the colours - and the ones I was not sure about - I saw as a challenge!

I started off putting the tulips in fifteen small clear glass bottles - all different sizes and heights. I cut the stems to fit the different bottles and put the taller ones in the back and the really little ones towards the front - and spaced evenly apart. I mostly put just one stem in each bottle but sometimes two - twenty tulip stems in all.


Then something inspired me to put all the little bottles in a basket - tightly packed together to give a more contained feel. I think it worked out very well and again the bottles were graded from tall in the back to the short ones in the front.


Have a Wonderful Floral Day!

See you later in the week!

xoxo Ingrid

Related Posts Plugin for WordPress, Blogger...