Showing posts with label Pompoms. Show all posts

21 October 2015

Do-It-Yourself Flower Tips and Inspiration - # 11 - Chrysanthemums and Snowberries


White Chrysanthemums and White Snowberries in white vases

This time 'Do-It-Yourself Flower Tips and Inspiration' is all about Chrysanthemums and Snowberries.

White Chrysanthemums in white vase


Here are a few facts and information about the flowers: 

- The Chrysanthemum is originally from the Arctic, parts of Russia, China and Japan.
- The name Chrysanthemum comes from the Greek chrysos that means gold and anthemon that means flower.
- Chrysanthemums come in many different forms and shapes; pompon, quill, spider and spoon are just a few of the interesting forms of the flower.
- Snowberries comes originally from North and Central America but now grows wild in many places.
- Snowberries are a member of the honeysuckle family.
- Snowberries are an important food source in the winter for many birds. 

White Chrysanthemums and White Snowberries in white vases

Brilliantly white fluffy Chrysanthemums and round white Snowberries are very effective and mixes well together at this time of year. 

I wanted to take a break from all the strong autumn colours I have featured lately. I love strong colours but I also love white. So here is a quick and easy all white arrangement.

I have used a large white vintage apothecary container for the big arrangement and a small white contemporary vase for my secondary complementary arrangement. Adding a few white honeycomb pompoms along the way.

Here I'm showing the arrangement with an all white background - white marble table, white French linen sheet   and white painted wood panelling. The arrangement works just as well as a contrast to something much more colourful.

Why not try it in a few different locations around your home - maybe you'll find some interesting colour combinations! 

White Snowberries in white vase

Enjoy your flower arranging!


Next Friday it's time for another FLOWERS from Titti and I. We will inspire on how to give your guests a warm and flowery welcome!  

~ xoxo ~

Ingrid


[Styling and Photography: © Ingrid Henningsson/Of Spring and Summer.]


1 April 2015

FLOWERS by ingrid and titti - Happy Easter!


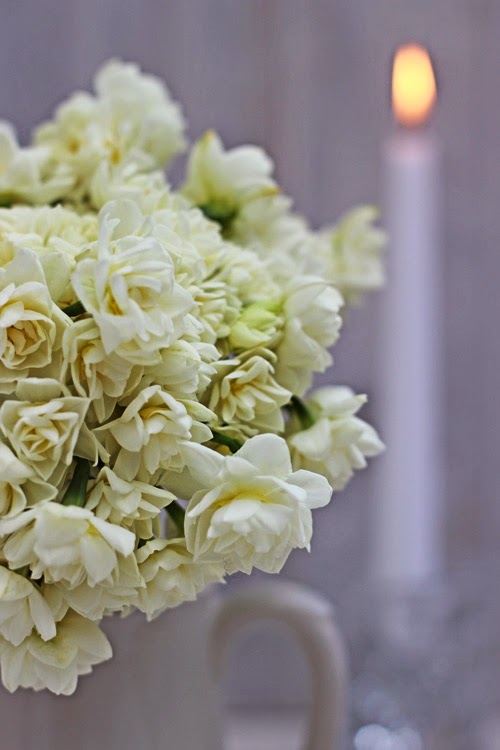
Narcissus 'Erlicheer'

The theme for FLOWERS this week is 'Easter' and here in the UK its four days of holiday!

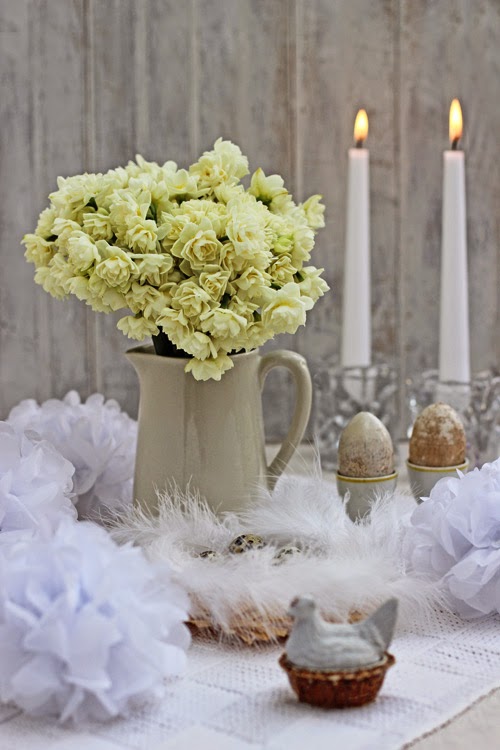
The flowers I have used are Narcissus 'Erlicheer' - its a highly scented cream double narcissi that has multiple florets on each flower stem. What a beauty!!

I bought he flowers at my local farmer's market where the lovely Cel Robertson and her partner Rob are back selling spring flowers from their weekly stall every Saturday morning. Cel grows all the flowers they sell on their organic farm Forever Green Flower Company in Norfolk and drives down to London every week. 


Narcissus 'Erlicheer'

We often associate Easter with the colour yellow - well yellow is lovely, bright and cheerful - but I find that a lot of people say they don't like yellow.

So I decided to go for a white and cream Easter. I made a hand-tied bunch and put them in a white vintage jug - simple and easy. The flowers are so beautiful just on their own I felt they didn't really need anything else.


How do you like my mini chicken in her little basket? I bought it a few years ago from an antique shop out in the country - in a part of Sweden called Österlen - in the south of the country.

Quail eggs and Easter feathers

I made a birds-nest out of raffia, bakers twine and chicken feathers. Its very simply made by taking a small handful of natural coloured raffia and making a circle - cut three lengths of baker's twine and make three ties around the raffia to hold it in place - place as many feathers as you like - around the sides and the top of the little nest - by placing them into the raffia and under the tied twine. That is it - quick and simple.

Narcissus 'Erlicheer'

These wooden eggs I'm told were used to encourage chickens to lay eggs. They still have some of the original paint. Also bought from the same antique store in Sweden as the chicken in the basket.

Antique wood nest eggs

The small quail eggs are real - they are empty - the content is already eaten. I think they look sweet in the little nest.

Easter quail eggs

Pompoms are always fun and these white fluffy ones are perfect for the white colour scheme. I'm not sure which ones I like the best the honeycomb kind or these ones. What do you think?

Narcissus 'Erlicheer'


Titti Malmberg - my Swedish based collaborator - who I work alongside on FLOWERS - has also created an Easter post on her blog HWIT BLOGG - so please follow the link and go over and see what she has done. 

You can see all our FLOWERS posts Here. 

We also have a special board over on Pinterest with images from FLOWERS.


Have a Very Happy Easter!

See you later in the week.

~ xoxo ~ 

Ingrid


[Styling and photography © Ingrid Henningsson for FLOWERS and Of Spring and Summer.]
[Flowers from Forever Green Flower Company.]

21 February 2015

A Bunch for the Weekend - # 40 - Pale Pink Cloni Ranunculus


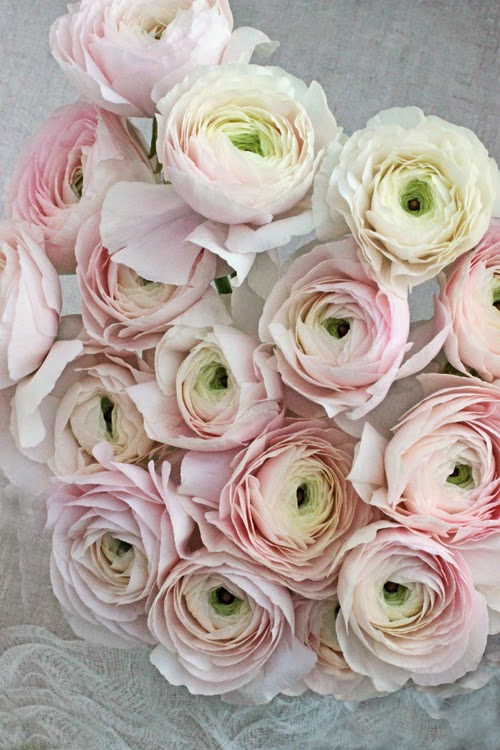
Cloni Ranunculus


Today on 'A Bunch for the Weekend' - I'm featuring some very pretty pale pink Cloni Ranunculus from Italy - where they grow beautiful Ranunculus with very large flower heads.


Cloni Ranunculus


 You'll need:

- 20 stems of Ranunculus in a pale pink colour
- a medium size clear glass vase
- 2 small containers for off-cut flower buds
- a few pompoms, a pile of books and a zinc watering can - all in grey tones
- a little white painted foot stool or similar and some gauze or other thin white translucent fabric 


For conditioning the flowers - you'll also need:

- a pair of florists scissors
- a florist bucket

Condition the flowers by removing any leaves that would end up below the water line in the vase. This is to reduce any growth of bacteria from deteriorating leaves. Also remove any broken or bruised leaves.

Cut the stems at an angle - this is to increase water absorption.  

Put in a clean container with fresh water and leave in a cool, dark place over night or at least for a few hours, to let the flowers absorb the maximum of water, before making the final arrangement.

You might have to re-cut the stems while making the final arrangement to suit the size of the vase or container and to get the right proportions.

Be gentle when you are handling the flowers as Ranunculus are quite fragile - the stems are soft and the delicate, papery petals tear and bruise easily.

Keep the water level in the vase low - if too much water the stems tend to rot.

The flowers should last for a week or sometimes longer.

If there are any small or big flower buds - keep them to make a few small arrangements on the side.


Cloni Rananculus


Start with some of the shorter stems and let the flower heads rest on the edge of the vase. Always measure the stems against the outside of the vase to make sure you get the right height. Continue filling the centre of the arrangement with slightly taller stems. 

Try to pack them as tightly as you can as you want to see as little as possible of the green stems. That way they also support each other in the vase preventing the stems from breaking. 

Pink Ranunculus

If you have saved any buds from when you conditioned the flowers - put them in a couple of small vases. They have a very different but interesting colour and texture then the flowers.

Cloni Ranunculus

I have combined the delicate, pale pink flowers with some neutral grey colours - including pompoms in two different sizes, a zinc mini watering can and some vintage books - chosen purely for the colour of the cover! 

Pink Ranunculus


For the next few months enjoy the beauty of these wonderful flowers - they are usually available until the late spring.


Cloni Ranunculus


Have a Happy Floral Saturday and Enjoy Your Weekend!

~ xoxo ~

Ingrid

[Styling and Photography © Ingrid Henningsson for Of Spring and Summer]

26 December 2014

A Bunch for the Weekend - # 34 - Skimmia japonica 'Rubella'


This week on 'A Bunch for the Weekend' - I'm featuring a bit of an unusual plant as a cut flower and it's called Skimmia japonica 'Rubella'.

We have just passed the shortest day of the year and flowers in the garden are in short supply, flowers in the florist shop during the winter season often come from far away and can be expensive.

There are some lovely potted plants around at this time of year - such as Poinsettia, Cyclamen, Paperwhites, Hyacinths and Amaryllis.

All these flowers are lovely and delightful - but I have already used all of them at least once in the last months - so I decided to try something a little bit different this week. 

I'm using a low-growing evergreen shrub called Skimmia japonica 'Rubella' and both my local flower stall and greengrocer were selling it as a cut flower.  

It has short stems but has these clusters of little, round, tight flower buds in a deep, dark, red colour and it has thick oval dark green leaves.


You'll need:

- about 7 stems of Skimmia japonica 'Rubella' - they will all have 2-3 flower heads on each stem 
- a medium size vase or container in a neutral colour - I have used a vintage zinc container
- a jam jar to put inside the main container 
- 3 grey and 3 white tissue paper poms poms - in three different sizes
- 3 Kosta Boda glass Snowball votive lanterns with tea-lights


For conditioning the flowers - you'll also need:

- florists snippers or scissors
- a florist bucket


As always - you need to condition the flowers - remove all the lower leaves that would end up below the waterline in the vase. Cut the stems at an angle - to increase water absorption. Put in a clean container with fresh water and leave in a cool place over night or at least a few hours before making the final arrangement.

With woody stems you also need to make a vertical cut up the stem to increase the area for water absorption. 


The container I have used can not be trusted not to leak and I also don't want it to get any more rust - so I'm using a jam jar filled with water inside.

The Skimmia stems are not very long so the arrangement will be fairly low and wide. The side of the zinc container flares out so the flowers will sit very nicely in a loose and natural arrangement.

The red flowers sits perfectly against the grey zinc and the grey is also picked up in the grey pom poms in the background.    


The grey and white tissue paper pom poms are all piled up in one corner and I have positioned three Snowball candle holders at the other end - both round and a little festive to fit the season.


Have a Happy Floral Friday and a Great Weekend!

~ xoxo ~

Ingrid

[Styling and Photography © Ingrid Henningsson for Of Spring and Summer]

20 December 2013

FLOWERS by ingrid x titti - Christmas!


Welcome to the first FLOWERS by ingrid and titti.

In my introduction to our collaboration last week I talked about that both Titti and I are Swedish - but I live in the middle of London and Titti lives on this beautiful island called Öland in the Baltic Sea on the East Coast of Sweden. 

Titti and I found each other through the blogging world - we both love working with flowers, we are both photographers and we are both very excited about our new collaboration.

I also introduced you to Titti's blog HWIT BLOGG that she has been writing since 2010 and here is her introduction to me and my blog.


The new column will have a different theme each time; this first one is Christmas and we chose to do two different arrangements.

The first arrangement is very much about colour and dramatic contrasts. I have simply used several branches of Ilex verticillata - a particular kind of holly that produces bright red berries on bare stems in the winter. The two containers I have used as vases are - a large clear glass vintage apothecary jar and a new red miniature bud vase.

To add to the festive holiday mood I have used a fabric with red dots, black and white baker's twine, some red and silver baubles in a Marimekko bowl and three traditional Danish felt Christmas tree decorations on a red ribbon.  


Round red berries against a fabric with almost the same size red dots makes a fun and interesting composition.


The second arrangement is more about using natural materials. I made a very primitive wreath from dried Clematis cuttings; I have also used moss, pine cones and dried orange slices.

Some other lovely props that I have used are some white honeycomb paper pompoms and for a touch of copper - a Swedish antique pot filled with pine cones.

I have to admit that I cheated when it comes to my little tulip arrangement. It looks like I have planted some tulips in a terracotta pot - but it is in fact three cut tulip flowers that sits in a small container of water inside the pot. I finished it off by adding some green moss around the flowers. 


Here is a link to Titti's - HWIT BLOGG - so you can go and have a look at what she has done. 

I hope you will enjoy our first FLOWERS by ingrid x titti.

Have a Wonderful Floral Day!

See you soon!

xoxo Ingrid


Related Posts Plugin for WordPress, Blogger...