Showing posts with label Mini Watering Cans. Show all posts

8 April 2016

FLOWERS by ingrid and titti - Spring is in the Air!


Yes, spring is definitely in the air here in London! Titti and I thought it would be a suitable theme for this weeks FLOWERS.


To capture the feeling of spring with flowers is not difficult at this time of year - flowers are in abundance and the colours are fabulous.


For this spring bouquet I have used white and pink tulips, some ranunculus in a couple of different pink shades and for green foliage a small leafed eucalyptus. 


I also made a second mini arrangement in a very small watering can - four ranunculus with a few little sprigs of eucalyptus and some raffia to hold it all together - just leaning to one side. A charming way to display a tiny arrangement. 


The large container is a zinc florist bucket that I have had for many years and it's still in use almost every day. Talk about good value for money!


The big arrangement is made straight in the container and I have grouped a few of the same flower together to prevent the flowers looking like dots.  


The piece of floral fabric that I'm using as a tablecloth picks up the pink and green colours in the flowers. A quick and easy way to make a base for the arrangement and to blend and tie it all together.


I think spring has arrived in the south of Sweden too - were Titti lives - I can't wait to see what spring-like flowers she has to show us. Here is the link to her blog. 


Have a lovely floral day!

We'll be back later in the month with another 'FLOWERS' -also with a spring theme. Before that I'll see you later in the week.

21 February 2015

A Bunch for the Weekend - # 40 - Pale Pink Cloni Ranunculus


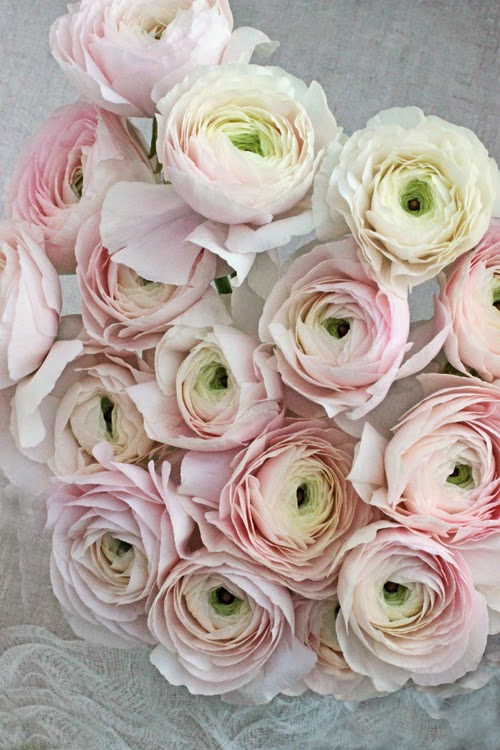
Cloni Ranunculus


Today on 'A Bunch for the Weekend' - I'm featuring some very pretty pale pink Cloni Ranunculus from Italy - where they grow beautiful Ranunculus with very large flower heads.


Cloni Ranunculus


 You'll need:

- 20 stems of Ranunculus in a pale pink colour
- a medium size clear glass vase
- 2 small containers for off-cut flower buds
- a few pompoms, a pile of books and a zinc watering can - all in grey tones
- a little white painted foot stool or similar and some gauze or other thin white translucent fabric 


For conditioning the flowers - you'll also need:

- a pair of florists scissors
- a florist bucket

Condition the flowers by removing any leaves that would end up below the water line in the vase. This is to reduce any growth of bacteria from deteriorating leaves. Also remove any broken or bruised leaves.

Cut the stems at an angle - this is to increase water absorption.  

Put in a clean container with fresh water and leave in a cool, dark place over night or at least for a few hours, to let the flowers absorb the maximum of water, before making the final arrangement.

You might have to re-cut the stems while making the final arrangement to suit the size of the vase or container and to get the right proportions.

Be gentle when you are handling the flowers as Ranunculus are quite fragile - the stems are soft and the delicate, papery petals tear and bruise easily.

Keep the water level in the vase low - if too much water the stems tend to rot.

The flowers should last for a week or sometimes longer.

If there are any small or big flower buds - keep them to make a few small arrangements on the side.


Cloni Rananculus


Start with some of the shorter stems and let the flower heads rest on the edge of the vase. Always measure the stems against the outside of the vase to make sure you get the right height. Continue filling the centre of the arrangement with slightly taller stems. 

Try to pack them as tightly as you can as you want to see as little as possible of the green stems. That way they also support each other in the vase preventing the stems from breaking. 

Pink Ranunculus

If you have saved any buds from when you conditioned the flowers - put them in a couple of small vases. They have a very different but interesting colour and texture then the flowers.

Cloni Ranunculus

I have combined the delicate, pale pink flowers with some neutral grey colours - including pompoms in two different sizes, a zinc mini watering can and some vintage books - chosen purely for the colour of the cover! 

Pink Ranunculus


For the next few months enjoy the beauty of these wonderful flowers - they are usually available until the late spring.


Cloni Ranunculus


Have a Happy Floral Saturday and Enjoy Your Weekend!

~ xoxo ~

Ingrid

[Styling and Photography © Ingrid Henningsson for Of Spring and Summer]

10 November 2014

Take 3 Flowers! - # 2 - Pink Tulips and Ranunculus with Eucalyptus Foliage


This is the second blog post in the series 'Take 3 Flowers' - where I will show you how to make easy but beautiful and stylish flower arrangements - just using three different flowers. Often one of the three will be some kind of foliage.

Using just three flowers will sometimes be a challenge - but it will also keep the cost down. Cut flowers can be expensive but foliage on the other hand tends to be cheep. You can use lots of it to help fill out the arrangement and to provide support and structure for the other flowers. 

I loved the contrast between the strong pink of the tulips and the Ranunculus; and the silver grey of the Eucalyptus leaves.

You'll need: 

- 9 stems of dark pink tulips
- 7 stems of dark pink Ranunculus
- 12 short stems of Eucalyptus leaves or similar silver grey foliage
- a fairly large vase or container - in this case I have used a florist's zinc bucket


Tulips are starting to appear at flowers stalls on London street corners - and they come in all kinds of yummy and delicious colours.


And also finding Ranunculus in similar colour to the tulips - I didn't have too hesitate.

Pink and grey is a lovely combination - so the grey-green Eucalyptus leaves were perfect.


For conditioning the flowers - you'll also need:

- florists snippers or scissors
- a florist bucket

As always - condition the flowers by removing any leaves that would end up below the water line in the vase. Cut the stems at an angle - to increase water absorption. Put in a clean container with tepid water and leave in a cool, dark place over night or at least a few hours before making the final arrangement.

Sorry, about always repeating this last bit - but it's probably the most important thing you can do to make your flowers last longer! So I'm afraid you have to put up with me always going on about it.


Start by cutting down the the Eucalyptus into smaller stems. They should not be too long - you want the flowers to sit above the foliage.  You'll need between 10 and 15 little stems - depending on the size of container. First line them around the edges and then fill in the middle with the rest of the stems.

Put the vase at the edge of the work surface and measure the height of the flowers before making the final cut. The Ranunculus should sit just above the foliage - but you can cut the tulips a bit shorter as they will continue to grow in the vase.  


A bowl of pink raffia! I love raffia and use it all the time to tie flowers and I tie it around vases as containers as decoration; I also use it instead of string or ribbons when I wrap presents.


In among the flowers and the pink raffia I have placed two little mini zinc watering cans. 

The evenings are getting darker and longer and its the time of year when its nice to light some candles. Have used some vintage mini tart tins with fluted edges to hold some tea lights. 

So here you have some flowers in strong colours and some little candles to brighten up the dark autumn evenings.


Have a Lovely Floral Monday!

See you later in the week!

~ xoxo ~

Ingrid


[Styling and photography © Ingrid Henningsson for Of Spring and Summer.]

Related Posts Plugin for WordPress, Blogger...