Showing posts with label Christmas Tree Baubles. Show all posts

18 December 2015

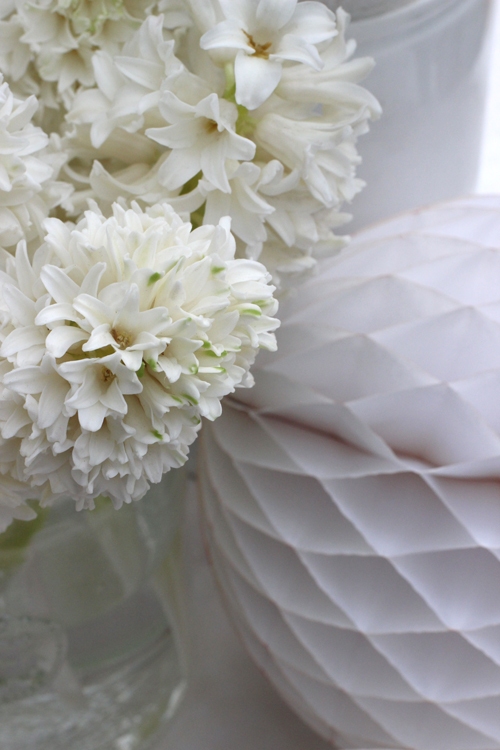
A Bunch for the Weekend - # 66 - White Tulips and White Hyacinths


'A Bunch for the Weekend' this week is a combination of white tulips and white hyacinths.


How To: 

You'll need:

 - 20 stems of white tulips.

-  7 stems of hyacinths.

- 2 vases or containers - in clear glass or white. In this case I have used a white vintage apothecary jar and a clear glass pickling jar.

- as props I have used white and grey honeycomb pompoms in three different sizes, a small bowl of Christmas tree baubles in white, silver and grey and a white fabric with a shiny pattern. 

For conditioning the flowers - you'll also need:

- a pair of florists scissors
- a florist bucket filled with fresh water

Condition the flowers by removing any leaves that would end up below the water line in the vase. This is to reduce any growth of bacteria from any deteriorating leaves - at the same time remove any broken or bruised leaves.

Cut the stems at a sharp angle - this is to increase the surface area and therefore increase water absorption.

Put the cut flowers in a clean container with fresh water and leave in a cool place over night or at least for a few hours, to let the flowers absorb the maximum of water, before making the final arrangement.

You might have to re-cut the stems while making the final arrangement to suit the size of the vase or container and to get the right proportions.


Method: 

- Keep as many leaves on the tulips as you can - it's nice to have some green as a contrast in this arrangement. Also keep the stems as long as possible. I have used a container with quite high sides - to keep the tulips contained. I wanted the white tulip flowers to sit closely together and not flop over and become more like dots in space.

- I bought the hyacinths as cut flower and when you buy them they come with part of the bulb still attached to the end of the stem. Usually you should keep the bulb-bit - but in this case as I wanted to use a clear glass container - I cut the bulb-bit off to give the whole arrangement a neater look. 

- The hyacinth flowers should sit right above the edge of the container that also holds the flowers nicely together as a bunch.


For anybody that is not going down the red and green or gold and silver route for Christmas - this arrangement would be lovely for both Christmas and for celebrating the New Year.


Both flowers are long lasting and even more so if you can put them in a cool place at night. The hyacinths in particular last for a very long time.

The fresh white flowers is a welcome rest from all the bright colours of Christmas and the scent from the hyacinths is also lovely at this time of year. 


Enjoy your flower arranging and have a beautiful floral weekend!

It will be a bit 'slow' here on Of Spring and Summer as I'm taking some time off over Christmas - but I'll be back next week with a little greeting. 


Ingrid

~ xoxo ~

[Styling and Photography: © Ingrid Henningsson II Of Spring and Summer.

You can also find me on:


14 December 2015

Tiny Blooms - # 21 - Holly and Rose Hips


This series of blog posts - called 'Tiny Blooms' - are about small flower arrangements. Small - might be the size of the container or it could be the size of the flowers or the amount of stems in each container. It can also be that the arrangement is minimal both in presentation and that it's simple, quick and easy to do. Apart from that there are no other strict rules - I'm allowing myself a lot of creative freedom!

I have used some glossy very dark green holly foliage and to that added branches of small red rose hips. They both come as quite tall branches and I have simply cut them down to about 10-20 cm short stems.

Cut the stems at different lengths to give the little arrangement some movement and interest.  

The vase I'm using is my old stand by - the mini version of Alvar Aalto's Savoy vase in white. It was designed in 1937 and is still being made and sold by Iittala in Finland. But any jar or bottle would be perfect.

Instead of just one make a whole lot of them and arrange them down the middle of the Christmas table.

This quick and easy arrangement would not take long to do - so another great one for the holiday!


Have a Lovely Floral Monday!

I'll be back later in the week with more floral delights from 
Of Spring and Summer.

Ingrid

~ xoxo ~

[Styling and Photography: © Ingrid Henningsson/Of Spring and Summer.]

You can also find me on:


Pinterest https://www.pinterest.com/ofspringsummer/

11 December 2015

FLOWERS by ingrid and titti - Flowers and Candles


The theme for FLOWERS this week is 'Flowers and Candles' - very appropriate for this time of year and it being so close to Christmas.

Christmas can come in many different colours - here are some inspirational images using quite colourful flowers and fabrics - mixing new with vintage and some subtle hints of Christmas! 

This first pink arrangement has a mix of tulips, hyacinths and Ranunculus in a metal container.


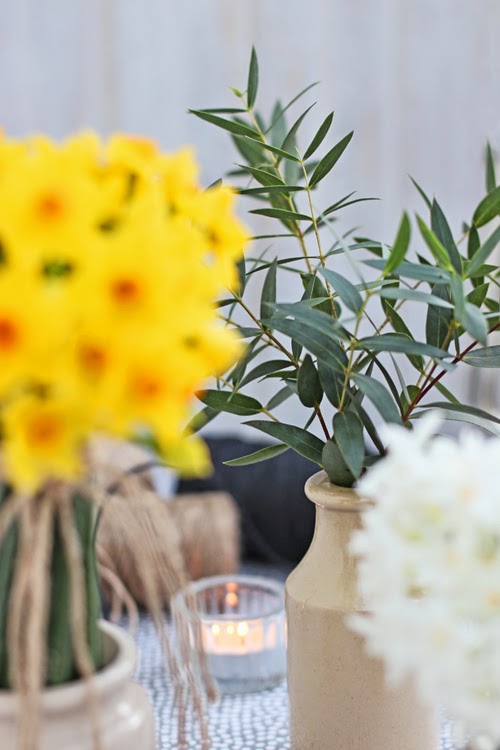
For each image I have included - some flowers or foliage in vase or container, a contemporary patterned fabric and a candle holder that is either a candle stick or a tealight holder. This very simple arrangement consists of grey-green Eucalyptus foliage in a white Bertil Vallien Kosta Boda vase.


I have of course also included some small Christmas decorations - such as a couple of different wreaths in the background, some vintage golden Christmas tree baubles, as well as some new silver mini baubles.


Even this black and white fabric has snowflakes on it! 
The flowers are some dark pink Anemones in a matching pink glass vase. I have used this arrangement in a previous post - but here added the pink tea-light and vintage baubles.


This last arrangement has some Hyacinths on their own in a vintage zinc coffee pot.

I hope you have enjoyed my little bit of a different or alternative way of decorating for Christmas. There really is no wrong way of doing it - it's whatever takes your fancy and whatever makes you happy that is the most important!


Please, go over to Titti's blog and take a look at how she has interpreted the theme this week. Here is the link to her blog HWIT BLOGG.

I will be back on Sunday with another Florets - floral quotes by flower lovers.

Enjoy your flower arranging and have a great floral day!

~ xoxo ~

Ingrid

[Styling and Photography: © Ingrid Henningsson/Of Spring and Summer.]

You can also find me on:

13 December 2014

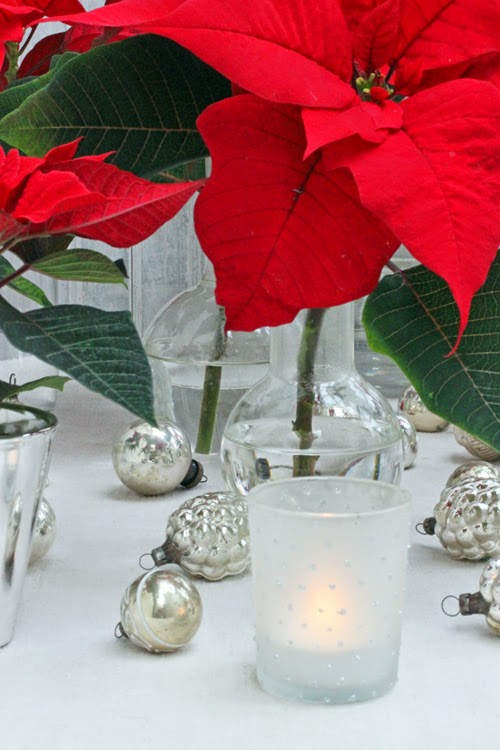
A Bunch for the Weekend - # 33 - Red Poinsettia


This week on 'A Bunch for the Weekend' - I'm featuring some bright red Poinsettias.

I'm using them here mostly as cut flowers - but I also have some potted mini ones. Nowadays you can buy large pots of Poinsettias very cheep in the supermarkets or DIY stores - and they make fabulous cut flowers.

All the ones I found are British grown - not flown in from far away - so that is very nice.

I wanted to display them in a very simple and neutral setting - and I didn't want to add any more colour - I felt the red was bright enough - so I just added some seasonal white and silver. 


You'll need:

- 2 large pots of Poinsettias with about four to six flowers on each plant
- 3 mini pots of Poinsettias with just one small flower on each
- lots of different size clear glass apothecary jars and containers or similar clear glass containers
- some tea-lights in candle holders with a bit of sparkle
- 10-12 small silver Christmas tree baubles 


For conditioning the flowers - you'll also need:

- a pair of florist scissors or snippers
- a florist bucket
- a container with boiling water

Cut the stems at an angle - to increase water absorption. 
But when you cut Poinsettias they excrete a milky sap - so you need to stop the sap leaking out to prevent the flower from wilting - some extra little conditioning methods are needed. 

There are a few ways to stop the sap leaking out of the plant. One is to sear the end of the stem with a flame for 10-15 seconds - another is to dip the end in boiling water for 30 seconds and yet another is to after cutting put the flower in warm water and leave it there until the sap stops flowing - then change the water.

I'm following Sarah Ravens suggestion of using the boiling water method. Cut the stem at an angle - have a bowl ready with boiled water - dip the bottom 5 mm/1/4" of the stem and hold it there for 30 seconds.


Arrange the flowers in the clear glass containers - I have used vintage apothecary bottles and jars with just one stem in each - super simple.

Among the bottles I have then arranged the three mini Poinsettias, some tea-lights in sparkly little candle holders and scattered quite a few small, silver Christmas tree baubles.

Quick, easy, minimal (except for all the red!) and as it turned out very cheep. Above all very seasonal and very much Christmas - but with a new slant on how to use a traditional Christmas flower! 

Here is a blog post I wrote two years ago - quite interesting that I used the same Christmas baubles and the same kind of mini Poinsettia in little silver pots. Back then I didn't know that you could use Poinsettia as a cut flower - you'll find that there is a bit more information about Poinsettia and some interesting links. 

Here is a link to what is called Stars for Europe - a European website with lots of information about Poinsettia. 


Have a Happy Floral Saturday and a Great Weekend!

~ xoxo ~

Ingrid

[Styling and Photography © Ingrid Henningsson for Of Spring and Summer]

8 December 2014

Take 3 Flowers! - # 4 - White and Yellow Paperwhites


I'm back with another blog post in the series 'Take 3 Flowers!'

Where I will show you how to make easy but beautiful and stylish flower arrangements - just using three different flowers. Often one of the three will be some kind of foliage.

Using just three flowers will sometimes be a challenge - but it will also keep the cost down. Cut flowers can be expensive but foliage on the other hand tends to be cheep. You can use lots of it to help fill out the arrangement and to provide support and structure for the other flowers.

Finding seasonal cut flowers at this time of year is not always easy - but Paperwhites is definitely one flower that we always associate with Christmas. The white one is the more well known but there is also a yellow one called 'Grand Soleil d'Or'. What a great name - 'Big Golden Sun' - it might not be very big but it certainly is very bright!

All the flowers are grown by Cel Robertson who owns Forever Green Flower Company - an organic flower farm in Norfolk. I buy them from her at my local Saturday Farmers' Market. I know they will always be fresh and in beautiful condition.

You'll need: 

- 15 stems of white Paperwhites - Narcissus 'Tazetta' 
- 21 stems of yellow Paperwhites - 'Grand Soleil d'Or' - also called Golden Yellow Paperwhites
- 5 stems of small dark leaved Eucalyptus foliage 
- 3 small vases or containers - in this case I have used three small vintage cream jars with narrow openings
- 2 small elastic bands
- black and natural coloured twine
- a selection of tea-lights in small candle holders, a lantern, some silver coloured Christmas tree baubles, a few extra cream jars and a fabric with a winter theme.


For conditioning the flowers - you'll also need:

- florists snippers or scissors
- a florist bucket
- a sharp knife and a cutting board

As always - condition the flowers by removing any leaves that would end up below the water line in the vase. Cut the stems at an angle - to increase water absorption. Put in a clean container with tepid water and leave in a cool, dark place over night or at least for a few hours before making the final arrangement.

Sorry, about always repeating this last bit - but it's probably the most important thing you can do to make your flowers last longer! So I'm afraid you have to put up with me always repeating myself.

In the case of Paperwhites if you buy them as cut flowers they will most likely come without any leaves.  


I didn't want to make one arrangement mixing the two Paperwhites in different colours with the foliage - but decided to put them in separate containers. 

To give the small flowers a bit more impact - I decided to do a version of what florists call Narcissus Topiary Tree arrangement.

You start with one stem in your hand and then add stems one by one - in circles going around the first one. With larger Daffodils you would position them so that each single bloom faces outwards - with Paperwhites, that has several blooms on each stem, this is a bit trickier - whichever way the blooms face - in the end the bunch will look lovely!

Hold the bunch quite high up and when you've added all the stems - tie some raffia, twine or ribbon just below the heads. To make it a bit easier you can put an elastic band on first and then hide it under a ribbon or twine. 

Measure where to make the final cut - by standing the container at the edge of your work surface and hold the arrangement next to it. You can then decide how tall you want the arrangement in proportion to the container. 

Lastly lay the bunch on a cutting board and with a sharp knife make a straight cut across all the stems. This is so that the arrangement can stand up straight in the container. You can help it along by placing some moss all around the stems inside the container.


Place the dark green Eucalyptus foliage very simply in a container on their own - just to add some greenery as a contrast and to give some texture to the arrangement.


The seasonal things around the flowers are some vintage silver Christmas tree baubles, a few tea-lights in small glass candle holders and a fabric with a winter theme - this one looks like fresh snow falling from the sky.

 Quick, easy and using just 3 flowers!


Have a Lovely Floral Monday!

See you later in the week!

~ xoxo ~

Ingrid


[Styling and photography © Ingrid Henningsson for Of Spring and Summer.]

[Flowers and foliage from Forever Green Flower Company.]

Related Posts Plugin for WordPress, Blogger...